Archery 101
September 7, 2023

Today is all about ARCHERY! To start off, let’s do a little Archery 101 for those starting out (and a little refresher for those seasoned vets).
Ya’ll know that archery has my HEART so let’s talk bows. If you don’t have a bow yet, you can head to your local Bass Pro, Cabela’s, or archery shop, and they can help you get started! Not all bows are created equal, and you want one that fits YOU. What does that mean? Each person will have their own draw length and draw weight. The bow shops will help you with both, but in a nutshell…
DRAW LENGTH
The draw length is the distance from your bow to the end of the string when it’s pulled back. This is important because each bow has a certain stopping point at which the bow will “stop†when pulled back. This length will need to fit YOU and YOUR body. Your draw length will also determine the length of your arrows – your local bow shop can help with this!
DRAW WEIGHT
The draw weight is basically the poundage needed to pull the bow back. This is also super important because not all bows have the same weight capabilities. For example, if YOU are only capable of pulling back 40 pounds, you probably won’t be able to draw back a bow that can only pull back 60 pounds or heavier. This is also an important number to consider depending on the wild game you’re hunting!
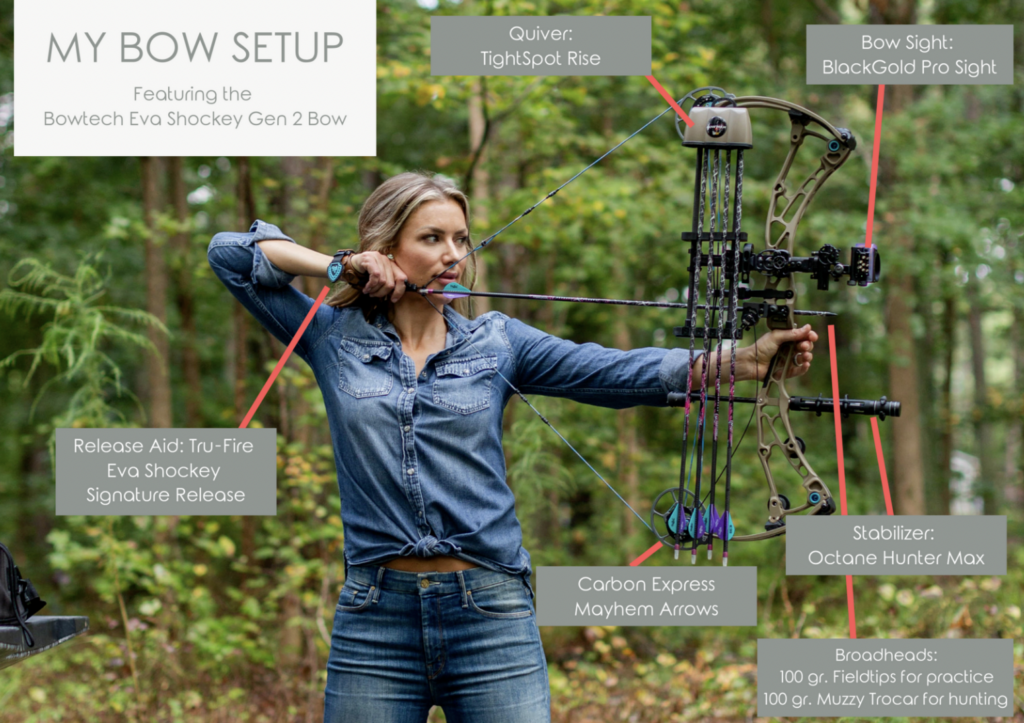
Here’s my bow set up with all the attachments I use! Save this photo for easy future reference. ⬇ï¸

Bow: Bowtech Eva Shockey Gen 2
Arrows: Carbon Express Mayhem Arrows
Broadheads: Muzzy Trocar 100 Grain Broadhead (100 gr field tips if I’m just practicing)!
Quiver: TightSpot Rise
Bow Sight: BlackGold Pro Sight
Release Aid: Tru-Fire Eva Shockey Signature Release
Arrow Rest: Ripcord Drive Cage
Stabilizer: Octane Hunter Max
Bow Maintenance
Before you start practicing, you need to do a little bow maintenance! So here’s a quick list of things to cover before you get started.
- Ensure that your bow was stored properly (in a case, away from high heat and water).
- Do a mini inspection of your bow for any damages.
- Check your bow’s strings & regularly wax the strings.
- Check that the nuts, bolts & screws are tight.
- Ensure arrows are all set up (fletching, broadheads, etc.).


Archery 101: Tips & Tricks
Tip #1: Master Your Stance!
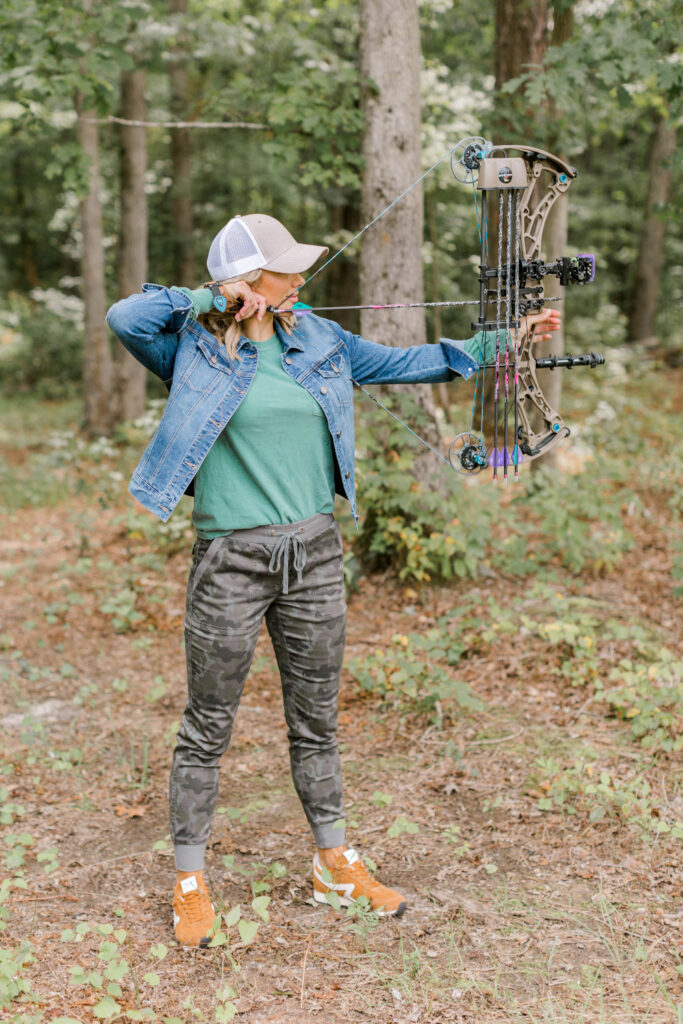
- For a proper stance, you want your feet shoulder-width apart and perpendicular to the target. For added stability, point your toes slightly outward and place your right foot (if you’re shooting right-handed) a tad bit in front of your left to open up your stance to the target. This will also help decrease the chances of the string hitting your arm when you shoot!
- Find the stance that’s most comfortable for you and once you have it down, ALWAYS find that same stance when you’re about to shoot. Consistency, consistency, consistency!
Tip #2: Anchor Up
- Now that you’re in the proper stance, it’s time to draw your bow!
- First thing’s first, let’s knock an arrow. Place the knock straight back onto the D loop until you hear/feel it click. Each arrow will have an odd vein or wing, and the odd one will always face UP!
- Next up is your grip! When you place your hand on your grip, you will use your palm only to push the bow out, versus wrapping your fingers around your bow. You can place your fingers straight out (out of the way of the arrow of course!) or bend your fingers at your knuckles.
- Now let’s draw back! Raise your bow so it’s right in front of you, and hook your release. Keeping your bow straight in front of you (vs up or down) use your opposite hand to draw straight back so your stance is now T-shaped; try not to bend your body at your hips while drawing back!
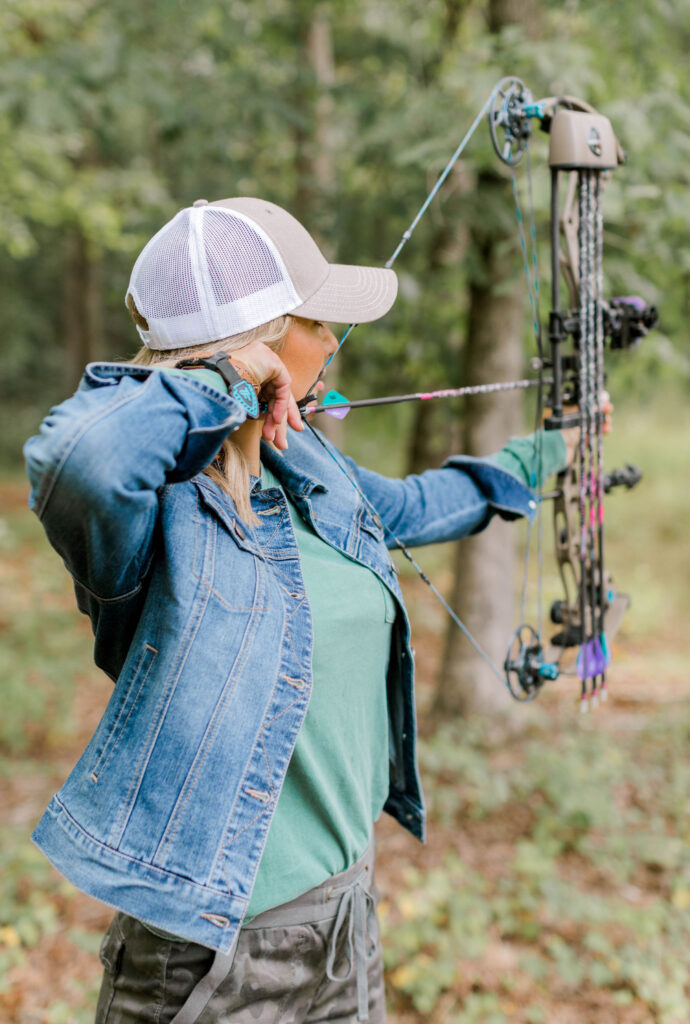
- Find your anchor point! Your anchor point will be wherever you place your string on your face. There is no exact point for you to place it, but the key is to be consistent! Find a place that is comfortable for YOU. For example, you can place the string on the corner of your mouth and/or rest the string on the tip of your nose. Like I said, the KEY is to be consistent with where you place both the string and your hand/release.
Tip #3: Let ‘Em Flyyyyy!
- Remember to relax your hand on the grip, using only your palm to push the bow out. Avoid hyperextending your elbow, and leave a slight bend in your arm to ensure the string doesn’t hit your arm when you shoot. Truuuuust me, that doesn’t feel great!
- Aim steady, and aim small! Then, gently pull the trigger on the release and let that arrow flyyyyy!
- Focus on follow-through! After you pull the trigger, you will want to focus on holding still until that arrow smacks the target; this ensures you don’t jerk before or while you’re pulling the trigger and keeps you niiiiice and steady!
- This is one that some people forget, buuuut it’s also crucial to practice shooting the same way you will be shooting during a hunt. If you’ll be high up in a stand, practice shooting from a stand, a deck, or somewhere higher than your target. If you’re hunting from the ground, you might even need to practice from your knees. I know, I know, this kind of throws a wrench in your form, but just place your knees like you would place your feet! Whatever way you will be positioned in your hunt is how you’ll want to practice as well!
Now it’s time to practice, practice, practice! I cannot say it enough, focus on being CONSISTENT with every single step. One thing that might be difficult is learning when to stop and REST for the night. Once you notice you might be sacrificing your form, it’s time to take a break.
If you haven’t practiced throughout the year, it would be a good idea to practice a few times a week. Not only to get dialed in for your first hunt but also to get those muscles working! You might be surprised at how much you can feel it after shooting for the first time in a while!
Another helpful tip is to simply practice drawing your bow back and slowly letting the bow down. You will actually gain a lot of muscle by doing this, so it’s a great exercise to get ya ready!
Here’s a little video recap of my top archery tips! ⬇ï¸
Keep everyone in the loop by sharing this post:
Leave a Reply Cancel reply
Design by Raise Your Words Design. Photography by Brynn Gross Photography. Designed with Showit.
Terms & Conditions
Privacy Policy
Drop a comment & let me know what you think!